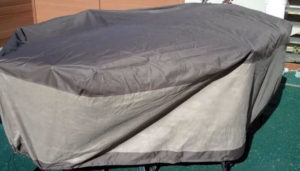
Wiring a garden shack is a great way to add some flair to your outdoor space. It’s also a great way to ensure you have a place to store all the tools you need and that you can plug them in, even in your yard.
There are certain basic steps to wiring a garden shed for electricity:
Check your local codes, ordinances, and permits
Select the size and amount of cable
Make a list of the items you’ll need
Draw out your plan diagrams & cable route
Dig a trench along your pre-planned route
Hire an electrician
Have a dedicated GFCI circuit installed & run the cable
Place your conduit in the trench
Terminate the cable at the shed, make installs, test, and seal
Refill your trench
I’ve watched an electrician go about wiring a backyard shed we owned, and I’ve also researched the topic myself. Some contractors may do this in a slightly different order or add some steps.
Most people will tell you (including me) that you should always hire a licensed electrician to handle this kind of project. I am listing the basic steps, and then you can decide for yourself if this is something you can tackle. Know what you’re getting into.
Wiring a garden shack can be dangerous if you don’t have the right tools or experience. If you’re unsure, hiring an electrician is probably best and often a regulation for any permitted electrical upgrades of this scale.
Notice:This is very basic information and is only for reference.
1. Check Your Local Codes for Electrical Work Like This
Local building codes vary, and some municipalities have specific rules about wire gauge and even the distance between your house and shed. Make sure you get permits and adhere to the building codes. In the past, we buried cables at 12in to avoid damage and get away with laziness. However, some codes may have you dig a full 3 ft trench.
2. Select the Size and Amount of Cable You Need
Using the information from our article,“What Size Cable Do I Need for Wiring a Garden Shed?” you can decide the size and amount of cable you need for this project. Again, in most cases, you will choose between 12 and 14 gauge. If your shed is over 50 feet from your space, or you plan on using heavy-duty appliances and tools that need more voltage, you will need to reduce the gauge (giving you higher amperage)to account for this.
3. Make a List of the Items You’ll Need to Purchase for This Project
It’s always a good idea to have an estimated cost of supplies, whether you handle this project yourself or opt to hire a licensed professional.
Standard supplies include:
screws
nails
cable
PVC conduit for burying the line in
PVC glue
outlet connectors
GFCI outlet
faceplates
wire caps
tape measure
shovel/post-hole diggers/digging pick
a drill
various household tools, caulk, and electrical tape
4. Draw Out Your Shed Wiring Diagram and Plan the Cable Route
By doing this, you can determine how many outlets there should be and where they should go. Second, it will help prevent accidents from occurring during installation. If you have a plan for where things are supposed to go, there will be less chance of mistakes during installation.
Finally, having an outlet plan can save time and money because if everything goes according to plan, there will be no need for any corrections.
You should also call 811 to find out where all essential and dangerous underground pipes and cables are. Once you have that information, you can plan your cable routing so that it does not interfere with anything already underground. It’s best to sketch this out for future reference.
5. Dig a Trench Along Your Pre-Planned Route
If your cable has a rigid metal conduit, you can have a trench between 6 inches and 1 foot. For wires which do not have a rigid metal covering, you will need to plan on digging a trench that is anywhere from 1 foot to 3 feet deep.
3 feet is the minimum amount required by most city ordinances. This can get complicated. You can be sure how deep to dig by checking local building codes and ordinances.
You can usually do this by hand, but you can also rent small augers when you have to bury a lot of cables or get the trench deeper than you initially assumed.
6. Make a Decision About Hiring an Electrician
If you need to be better-versed in residential electrical work to do this, please hire a licensed professional electrician from your area. In order to be permitted, most projects like this will have to be handled by a licensed electrician in adherence to all local codes.
They can get you to get the correct permits. They should know about all the local codes. Be sure they are insured, in case anything goes wrong. Experience and connections count.
Handling electricity and using your home as the power source for the wiring to your shed can be dangerous. If you do not run the electrical wiring correctly, you could overpower or under power your shed. You could get shocked or start a fire. You might also cause damage to any existing wiring, including what is in your home. So be very sure before taking this on as a DIY project.
Find out if the electrician plans to provide all the supplies needed for the project or if you need to do that. Obviously, if you’ve decided this will be a DIY project, you will be responsible for everything. That’s what the list you made previously is for.
7. Have a Dedicated GFCI Circuit Installed, and Run the Cable to the Exterior
This is usually the job of that licensed electrician you hired. The next step is to get into your electrical panel and add a dedicated GFCI circuit for your shed. You may run the electrical wire for the new circuit through the walls and basement or crawl space of your house (usually along joists or through them). It should lead to where you want the beginning of the pre-planned route.
I paid the electrician for this kind of work. Unless you are a licensed electrician, I’m sure you made the right move and hired one! Right?
8. Place Your Conduit in the Trench
After your trench, if your cable does not have a metal conduit, you will want to pick a PVC conduit to use as a protective shield for the wire between points. If the wire was bare, it could cause a potential electrical and fire hazard. Insects will also eat through your wire.
You’ll want to thread your wire through the conduit with as few bends as possible. Use PVC glue wherever there is a connection.
Did You Know?
NEC guidelines do not allow more than two 90-degree turns. Going beyond these requirements will cause your cable to become a fire hazard.
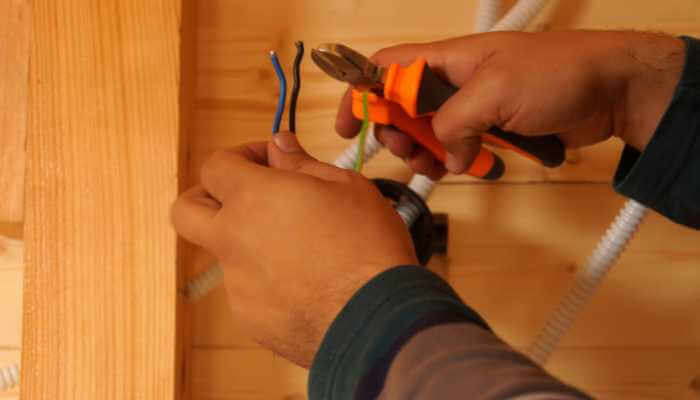
9. Terminate the Cable at the Shed and Install Your Outlets or Breaker Box
Another hole will need to be drilled to get the cable and/or conduit through and into the shed where it needs to be. You can then install (or have your electrician install) what you need–outlets, switches, lighting fixtures, etc.
A licensed electrician can make quick work of this. It is also essential that they do this for code and permitting purposes. Once everything has the thumbs-up, you can seal all connections at the source and the shed with the caulk.
10. Refill Your Trench
Bury the wires. Some folks place sand between the PVC and the dirt for further stability and protection. The sand will also fortify the PVC pipes as it gets wet. Backfill the trench with soil. You should keep the sketch of your pre-planned route for future reference when digging. You should include it in any information for new home buyers should you sell.
Remember, this article was just to give you an idea of all the steps so you can decide what you can and cannot do yourself. My advice? Always hire a licensed, insured electrician. And make sure you get permits and adhere to what the inspector tells you to do. That way, you won’t need to rip things out and do them all over again. This can be a worthwhile upgrade to your backyard shed, so long as it’s done properly.
"Growing up a country-girl means you enjoy the outdoors as much as possible, and no matter where you go in life, the outdoors is always part of you. I began doing research on things I wanted to do to make my outdoor space my own, no matter where we moved. And that research led me to write this blog to share with you!"

")
")
")

")


")