So the easiest way to install landscape lighting – in my experience, is to actually grab some graph paper, walk outside and begin mapping out where you need lighting. And then, go back over your yard at night as well. Be careful, but doing it at night will let you actually see where the yard needs more lighting.
In general, you should choose & place landscape lighting based on what you need. Silhouetting from the back or uplighting from the front will highlight a feature. Downlighting will diffuse light over a large area. If you need subtle lighting for safety, unobtrusive recessed lighting may be best.
Want to get into more detail? Sure! Just keep reading and I will be happy to give you pointers for mapping your best landscape lighting to enhance your outdoor living space and provide your family and friends with safety.
You may want to enlist the help of not only a licensed electrician in all of this but maybe even a landscape designer or a professional lighting designer. These licensed professionals should know what they can and cannot do when it comes to electrical-based wiring, they’ll know all of the most current laws and regulations in their field. There are outdoor lighting ordinances, after all.
If you want to tackle some of this yourself, you can take my advice on the different steps.
You are essentially placing your lighting where you need it to go depending upon the use of said lighting. The graph paper is only for when you need to visualize what you want to place where in your yard. You simply diagram everything in the yard, including the trees, shrubs, plants, landscaping, steps, and the deck or patio. Get measurements and plan how you are going to hang any string lights.
Then, you go back and map out where lights are wanted and needed on the graph paper. Keep in mind the type of fixtures you plan on using and that will give you an idea of the spacing. Of course, if you use all solar, you may not have to worry so much about the transformer. But if you’ll need it, decide where to put a low voltage transformer – usually, it is placed in a hidden area around the house.
Once you have that diagram, it’s time to count up the number of lights you need and the kind. You’ll also want to include a transformer near your fixtures if they’re too far away from the main transformer. You can mark them on the map and also if you want – in the yard (using flags or other types of easy-to-stake markers).
You’ll also need to figure out how you plan on running and hiding your cords at this time. It can go on the diagram, too. There are several methods of setting up your wiring for your landscape. Also, as part of your planning, make sure you map out the points where you are going to ground your lights.
Daisy Chain Method – It connects all fixtures like a string of daisies from the first fixture, which is the one connected to the transformer. The only drawback to this method is a voltage drop over distance from the transformer.
Hub Method – Each wire run is connected to a hub junction. From that junction, an individual wire runs to each fixture. This method ensures equal voltage at all fixtures. Unfortunately, it uses more wire than other methods, and the use of LEDs makes it kind of obsolete. You can use the hub method if you don’t want to do a lot of splicing in the field and the fixtures are grouped in a small area.
T-Method – You could say it’s the daisy chain except the transformer connects to a fixture in the middle of the chain. This conserves the wire used in the project. The voltage drain is pretty much the same.
Combination Method – This is what most LED systems use because it combines all of the other methods to conserve wire, reduce splices, and make installations easier. You’re basically using more than one of the methods for running your wires that we’ve already covered.
Once you’ve written out your instructions and measurements on your diagram, everything can be handed over to your licensed and insured electrician. I always recommend using a professional instead of DIY when it comes to things like electrical work.
If you have the licensing and capability to handle electrical work, go for it. If you are a licensed and insured electrician with experience in landscape lighting, you probably don’t need my article!
The only other thing you may want to do is purchase the equipment you want them to use. But, there are some things to consider before you wind up making multiple trips to the hardware store or a local big-box.
Some things to consider if you wind up purchasing your own equipment:
Get enough transformers and select the proper transformers. You need to add up all the bulb or fixture wattages. Your transformers need to have wattage greater than this number. Then, multiply the wattage of your transformer by 80% so that you give 20% as a buffer. If you’re still over the combined wattage of your bulb/fixture wattages – you’re good. If not, you need to get the next size up for your transformer.
Break your layouts into zones. Don’t go over 150 watts per zone. That goes for cable runs as well. You want only up to 150 watts or you’ll begin to experience a voltage drop in your more distant lighting.
Get the proper cable gauge so that you don’t experience voltage drop. If your wire runs are under 150feet (45 meters) you should use 14 or 16 gauge wire. Use lower gauge wire (thicker) if you have longer wire runs.
Boost’s Tip
Use LED lights for a true low-voltage advantage. Safe energy and still keep a lovely look for all of your outdoor lighting. They also come in the dusk until dawn variety that only lights at night, when they are needed.
Lighting Up a Feature in Your Landscaping
Depending on the feature and where it sits in your yard, you have several options. But you’ll probably want to get a spotlight of some kind for this particular situation. Those come in both solar and wired. But how you place the lighting then depends on how you’d like your feature to be highlighted.
You can use uplighting to place a light or lights on the ground before the item you wish to highlight. If you angle the light upward to the item you want to highlight, there should be a bright burst of light on it.
Siloughetting is the act of angling a light nicely from behind the item you want to highlight. It creates a dark resonance on the highlighted piece, which is interesting from the front.
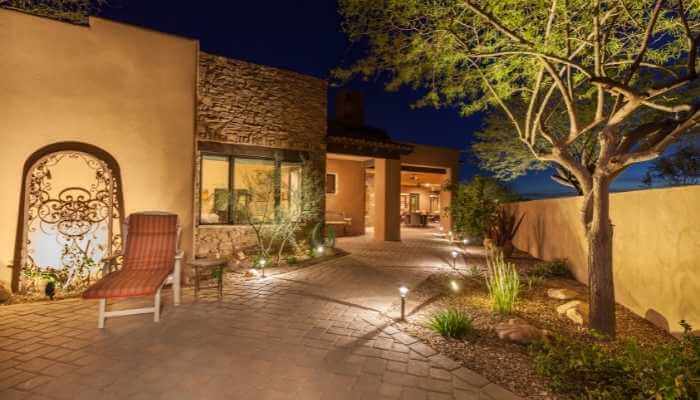
The last lighting method that can be used for highlighting a piece of landscape is grazing. Now, grazing is specifically for showing off the texture of your landscaping item that you want to showcase. It comes from resting the lights very close to a textured surface like stucco, veneer, or stone in a stone wall.
Always readjust your lighting to be sure there is no glare for people in your outdoor spaces or if these lights are near a road, be sure the lights don’t cause a driving hazard. If they are too bright and aimed in the wrong direction can cause a lot of trouble.
Lighting Up a Large Area
If you want to light up a large area, it might be best to use the downlighting method. What you’ll want to do is place your lighting up higher and then diffuse that light downwards from the source. Of course, this means sometimes using a specific kind of light.
You may also want to install dimmers in areas where you’ll have people sitting or enjoying the nighttime in your outdoor living space. After all, you don’t want your neighbors watching you enjoy the hot tub, and sometimes those bright outdoor lights can be downright obnoxious. Dimmer does away with that issue.
You have your choice of lights when it comes to lighting up a large area and specifically for using downlighting as your method. You ant lights that face downward. Some flood lights made for this “moonlighting” are actually made to mimic natural moonlight. It’s often placed high – even in trees. It’s for mood and not safety, that’s for sure.
Since too much light can be an issue, be sure to look into Dark-sky friendly lighting when you make your purchases for lighting up large areas in your yard. And don’t leave those lights on at all times. There’s too much light pollution as it is. And these kinds of lights are not made for safety, anyway.
Landscape Lighting for Safety & Security
This kind of lighting can be either to highlight paths or to make sure your steps and any dark places that could be a hazard are lit up appropriately. There are specific path lights made for safety in your yard and then, there are recessed lights that have “cans” that screw in where they are needed, usually on deck stairs or around them.
Path lights are the ones with stakes on the bottom and are set up specifically to give off light on paths or near driveways. You want to make sure that these lights are spaced far enough apart that they aren’t overly obnoxious but at the same time, they need to be close enough to actually light the path.
Another thing landscape lighting can be used for is to dissuade criminal activity. If the lights come on to showcase someone up to shady happenings – they tend to leave. In this case, you may want to look into lights that have motion sensors.
Any of these lights can be solar-powered or you can opt for fully electric. When it comes to lights that safety relies on, I personally prefer electrically powered lighting. You can space them a decent distance apart (5 – 8 feet / ⅕ to 2.4 meters apart!).
You are trading some planning time and probably some digging time for that stronger light. They have wires and those need to be hidden properly to keep the look nice and neat and to keep from being a trip hazard when you’re trimming the landscape.
However, if you go with battery backup solar-powered lights, those things often last quite a while. Quality matters when you choose solar lights. Also, they need at least 6 – 8 hours of direct sunlight daily to be effective at night. At 40 watts this is not usually as bright as standard pathway lighting, so you may need to have the lights a bit closer together.
It really just comes down to making sure your light is getting enough power to keep going when they are needed most. Test them at night to be sure they’re bright enough and that they last long enough for everyone at your home. Check that the motion sensor definitely activates as it should.
If you opt to have these lights near plants then be sure to check out my article on how they can be bad for your plants.
In Conclusion
My opinion is to do as much as you can upfront and then consult a licensed and insured professional to handle the rest of your landscape lighting needs. But that means you can sketch out your plans and know what kind of lights, how many transformers, what kind of transformers, and the type of wiring you’ll need all ahead of time. This will make the end job so much easier and quicker. And it’ll give you more time to enjoy your outdoor living space.
"Growing up a country-girl means you enjoy the outdoors as much as possible, and no matter where you go in life, the outdoors is always part of you. I began doing research on things I wanted to do to make my outdoor space my own, no matter where we moved. And that research led me to write this blog to share with you!"


")
")


")