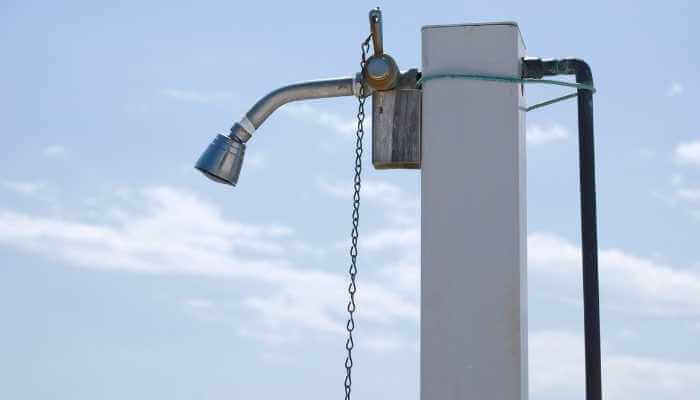
Outdoor showers can pop up pretty much anywhere. They’re usually prevalent in public places like pools, beaches, and campgrounds. They’ve become a common addition to private backyards, too. So, what do you do with your outdoor shower when winter comes around?
There are proper steps for winterizing your outdoor shower.
Drain the water from all its components
Clean it.
Remove problematic parts.
Insulate and cover all pipes.
Cover the entire shower.
Want me to get more detailed and tell you how to do this step-by-step? Just keep reading!
How Do I Winterize an Outdoor Shower?
1. Turn off the water supply to the outdoor shower.
You don’t want water to get into the pipes and freeze. That means shutting it off at the source, not at the shower itself.
2. Drain any water left in the pipes or the tank (if your shower has a tank).
Like when you shut off the water at the source, you do this to prevent freezing and cracking of the lines. Once the water source gets shut off, there will still be water in the shower itself, so you need to run it to get all the water out.
3. Leave the faucet on.
This is one that many people forget. It would be best if you left the faucet in the ON position. Why? Well, there’s a very slim chance that water might get through and enter the shower system. If it does, you don’t want it staying in there during winter.
So, leaving it on ensures that the shower constantly drains. Because you are doing this, it’s a good idea to check on your outdoor shower during the winter to ensure it’s not leaking water.
4. Remove the shower head and the valve cartridge.
Yes, it would be best if you did this. Again, in the off chance that water gets stuck in the shower head or gets turned on or there’s a valve leak, you want to eliminate any tight fittings. Plus, if you remove the shower head, it’s less likely to get damaged before the spring, when you’ll begin using the outdoor shower again.
If you have questions about removing both parts, read the instruction manual and follow the directions. If you’ve lost the instruction manual, there are product websites that can help. There are also online instruction manuals and YouTube videos you can research. Be sure to take the shower head and valve cartridge indoors and store both properly in a dry place.
5. Clean out any debris that has collected inside over the course of the year.
This could be dirt, leaves, or branches — everything. Ensure you clean the drains and dry out as much as possible. Also, dry out the shower itself. You want to leave as little moisture as possible because ice can damage the shower base, not just the pipes.
6. Cover any exposed pipes with insulation and wrap them in plastic.
This is to prevent them from leaking during cold weather. Remember where you took the shower head and the valve cartridge off? Wrap that. Then, extend that insulation and wrapping to all exposed pipes, including the source pipes and valves at the house or structure.
7. Cover the shower with a tarp.
You don’t want to leave the shower open for anything to get into it. So you want to close any doors to it if there are any. Then, regardless of the door, cover your outdoor shower with a heavy-duty tarp. This will keep the snow and other debris, like leaves and branches, out of the shower area.
8. Finally, cover up all electrical outlets with plastic.
This really isn’t just for your shower area. It’s for your outdoor living space in general. Our electrical outlets already have plastic covers, but if yours does not, be sure to cover them all while doing this.
What You Should Know About Showers
You can find outdoor showers in many places, and they come in various styles. Some are free-standing, while others are part of larger structures, such as bathhouses, cabanas, or as part of pool areas.
My first experience with an outdoor shower was at my aunt’s pool. It was to help wash off body oils and dirt before getting into her pool. And when we got out of the pool, we hit the shower again to wash off the excess chlorine. I’ve also used them at campgrounds and at the beach, where you can use them to wash off excess sand before getting on your way.
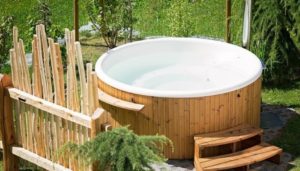
I’ve often wanted to have my own when we were sweaty from yard work or exercise. Also, we want to rinse off before and after a time in the hot tub. But in areas where the temperature can get below freezing, you may not want the trouble of an outdoor shower.
In Closing
You can find outdoor showers in places like public parks, beaches, and poolside. It might surprise you how many people have them installed in their homes. After all, outdoor showers are a great way to wash off after a long day of gardening or playing outside.
You can also use them to rinse off if you use something like a pool or hot tub with a lot of chlorine. I hope this article can help you with the maintenance that is winterizing your outdoor shower.
"Growing up a country-girl means you enjoy the outdoors as much as possible, and no matter where you go in life, the outdoors is always part of you. I began doing research on things I wanted to do to make my outdoor space my own, no matter where we moved. And that research led me to write this blog to share with you!"

")
")

")

")