When it comes to prepping your garden or raised beds for winter, you might as well consider starting in the fall. It should be an ongoing cycle for you to manage your beds anyway, but when prepping for winter, there is a specific to-do list.
For fall and winter, make a record of where you had everything planted, weed, clean out, and amend the soil of the garden bed. Then, a cover needs to be placed as the top layer. What the cover is made of depends upon if you plan to grow through the fall and winter or if your bed will be dormant.
Let me explain not only the steps I’ve listed, but also the materials you might need to cover, and the crops you could be growing.
How to ready your garden beds for winter
Before you do any prep work for the winter months, it’s really a good idea to make a record of where you have things planted within your garden. You can do this by taking pictures or by making a diagram. Either way, this will be helpful in knowing where to plant come spring, and what to plant, and can remind you where to rotate plants as well.
During late fall, I set about pruning all my wood-stalked plants and shrubs and trees. Perennials get a trim and then I can just put some dead leaves over them once the time for frosts gets closer.
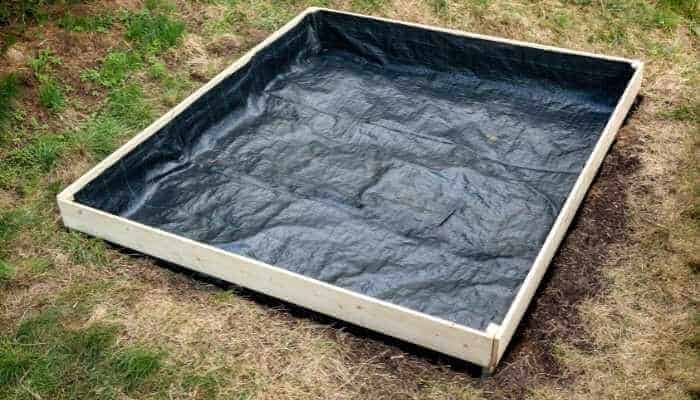
Another thing to do in the fall is weeding all of the beds before you do anything else. If you don’t the weeds can set up their roots for the long haul. If you let them get away with seeding, those seeds can stay viable for years. You don’t need that fight. If your beds are carpeted in grass and you don’t have time to weed, cover the top of the bed in black plastic or cardboard.
Once the first frost hits, you need to clean out the garden beds. You may have old plants still in there and they may have diseased leaves or be infested with insects or eggs that are dormant. You should collect all of that, trash the diseased and possibly infested portions, and then compost the rest.
You can harvest seeds from plants you plan on growing again next year. That’ll save you some money. Also, if there are any plants you want to keep growing and you have the space for it – say a greenhouse – you can move those at this time.
Once your garden beds are cleared of any growing vegetation or the ghosts of summer and spring past, you can enrich the soil by amending it with compost and manure. I just use a hand rake to manage this, and I usually add a compost mix. I do my best not to till the soil too much – so long as it’s not been packed down, letting the soil rest is best.
Remember that manure is pure stuff – and will have a special odor. But if you get compost to use or have your own composting going on, the manure has already been mixed into the other organic waste and has changed, so the odiferousness will have lessened.
Once that’s done, I cover it with natural mulch. That way, when I’m ready to plant again, I just have to scoot the mulch aside and dig in. If I want to use anything except mulch, I’ll use dead leaves that I raked up already. My first use for those leaves is to help with keeping other plants warm beneath them, but any extras I use for covering the beds.
In some cases, I have actually just cut the leafy parts off and left the roots to rot and enrich the soil. You can then plant new plants there come spring and the enriched soil will already be there to help with the transplanting. If it’s a perennial – like a kale variety, for instance, I’ll let the leaves stay, because they’re usually very pretty and easy to remove come spring.
But, I never…ever…leave my soil bare. Natural mulch is an annual purchase from our local coop or waste management department (so long as it’s certified natural with no chemicals). Do not till this material into your beds. It’s called a winter cover for a reason. It will decompose and naturally blend those nutrients into your soil over winter.
How to Protect Your Raised Beds During Winter
Mulch
So long as the mulch you get is natural and has not been chemically treated, you should be good to go. I use at least an inch and a half but some farmers use 2 full inches (2.5 – 5cm) of mulch. The reason I use less is that I usually add compost of leaves first before the mulch, so that takes up a nice bit of space.
Black Plastic
Well, actually you could use any plastic or tarp here for covering your raised garden bed. The plastic may not be ideal, but it will keep rain from compacting the soil or causing erosion – whichever the case may be. The drawback is that plastic lasts a very long time and can be harmful to the environment in the long run.
Plastic also can heat up when the sun shines directly on it and destroy diseases and harmful microbes, fungi, mites, weeds, and weed seeds in the soil. Beneficial microbes are much more heat tolerant. The use of plastic in this manner is called Soil Solarization. Some farms use solarization during the peak of summer to destroy all kinds of pests.
Just be sure to keep a check on the soil to be sure it doesn’t dry out – which would also kill the beneficial ecosystem under the covers.
Productive Things to Do with Empty Raised Beds During Fall & Winter
If you have decided not to cover your raised beds for the winter, you can plant what is known as a cover crop. These easy-to-grow crops can become weeds if they don’t die out over the harsher winter months, so be aware of that. You want them gone when you’re ready to plant in spring.
Cover crops prevent soil erosion, maintain soil health, and can also stand in to prevent weeds in your garden beds over the colder months. Some crops can actually be used while others are there to be beneficial and then wind up just incorporated into the garden come spring planting.
Oats or winter rye is an example of the latter. They grow quickly even in cooler temperatures. They will die off in winter freezes, leaving behind dead organic material that you can just plant through come spring. That cover of dead oats will also help in retaining water for the next year. If you opt for rye, you’ll also get a natural herbicide that it gives off via the root!
Another farmer that I read about in Mother Earth Living says he uses Dutch white clover between rows when he plants in the spring. That way, come fall and winter, this plant kind of makes a natural mulch. And if you’ve ever worked with clover, you know it’s relatively easy to pull and move and transplant. I may try this method next.
If you want crops that work over winter, look to garlic and onions. These plants continue to grow and will be ready to harvest come the next summer. Broccoli, brussels sprouts, and spinach all grow well during the winter. Kale and collards are known to even get sweeter to the taste (especially cooked greens) over the winter and through light frosts.
And if any of these plants are leftover (and are not diseased0 they can be used as organic material the next year to enrich the soil.
Don’t Forget
This has nothing to do with the actual covering of the garden beds, but please be sure you turn off your watering system before winter hits. And if you have nozzles outside the house, those should be wrapped up to keep the piping from busting.
You’ll also want to cover up your compost pile so that the worms can continue to work their magic and the materials will remain in a state of decomposition through winter. If you have fruit trees, there is a material called tree-wrap that can go on the lower trunk to avoid moles and voles from damaging the bark.
Your tools are as important as anything else, so be sure to clean them and oil them to avoid rust. If you have any power tools, winterize them according to their manufacturer’s guides (usually the liquids should be drained).
If you want to know more about which plants to take in or leave out according to your zones and also according to the plant itself, ask your local extension service, your local coop, or there’s always The Old Farmer’s Almanac.
